A Beginner’s Guide to Website Staging (And How to Set It Up)
Maintaining a WordPress website is a never-ending process. Even after you’ve built your site, you’ll likely continue to update and make adjustments indefinitely. This means you need to find a way to test those changes without negatively impacting your website or its visitors.
Often, the best way to do this is to create a staging site. Also known as a testing or development site, this is a standalone copy of your website. You can use this copy to try out new themes and plugins, test bug fixes, and plan out changes well before implementing them on your live site.
In this article, we’ll explain everything you need to know about staging sites, including why they’re so useful and how to create one. We’ll also provide some tips on how to use your new staging website effectively.
An Introduction to Website Staging
When you create a regular website, one of the first things you’ll typically do is choose a domain and settle on a hosting plan. These steps are necessary for getting your site online so that people can visit it through their browsers. The result is often referred to as a ‘live’ or ‘public’ site.
A staging website is similar in many ways to a live site, but its purpose is very different. Staging sites are private — not intended for just anyone to visit. They’re used as a tool for experimenting and testing. For that reason, they’re also frequently called ‘testing’ or ‘development’ sites.
There are two primary forms a staging site can take. It can be an entirely new, blank website or a carbon copy of an existing one. Both types have many uses, which we’ll discuss shortly. It’s also worth bearing in mind that a staging site can be completely offline and stored on a local computer or hosted online but marked as private. Staging sites are very beneficial, but chances are you won’t want anyone else to be able to find them.
The Many Benefits of Creating a Staging Site
So far, we’ve been discussing staging sites in the abstract. At this point, you may be asking, “But what do I actually do with one?!” The truth is there is a wide range of potential applications.
These are a few of the most common:
- You can build a new website, then design and tweak it until it’s perfect — all while keeping it private. Then you can make it (or a copy of it) live when the time is right.
- Staging sites are the perfect playground for learning about the WordPress platform. You can use them to try out new plugins and themes, experiment with custom code, and so on.
- If your staging site is a copy of your live site, it’s the perfect place for bug-fixing and testing solutions to any errors that are giving you trouble.
Of course, all of these things can be done on a live website. However, that’s a risky proposition. If you try out a new plugin or test a bug fix on your public site, you risk breaking something in the process. You could also end up slowing down your website temporarily, causing downtime or otherwise interfering with your visitors’ experience.
That’s why a staging website is so valuable. It helps you ensure that everything is working properly before making any changes to your live site. Plus, it lets you make sure a new site is completely ready to go before anyone can find it. For these reasons and more, having at least one staging site handy is essential for nearly every WordPress website owner. Unless you plan to never make any changes to your site (which we don’t recommend), it’s well worth knowing how to use this valuable tool.
How to Create a Staging Site in WordPress (With 2 Methods)
Putting your staging site together can be easy or complicated depending on which method you use, and whether you’re creating a new website or copying an existing one. Below, we’ll present two of the best ways to get the job done. We suggest reading through each one, then picking the technique that’s most suited to your needs.
Before moving on, however, this is the time to create a backup of your website if you don’t have one ready. Creating a staging site shouldn’t impact your live site in any way, but it doesn’t hurt to be careful.
1. Set Up Your Staging Site Through Your Web Host
Perhaps the most convenient way to create a staging website is to do it through your existing web host. In fact, several hosts have simple one-click staging built right into their WordPress solutions, removing the need to install additional plugins or finding alternative workarounds to use staging.
While the resulting site will be online, you can still ensure it’s private, and visitors and search engines won’t be confused with your live site. Plus, it will usually be simple to make your staging site a copy of the live version. If your hosting company offers this option, there’s really no downside to using it.
The process of creating a staging site this way will depend on what tools your particular host offers. Your best bet is to contact them for help or check our their documentation.
Of course, if you have a managed WordPress hosting plan here at DreamHost, we can show you exactly how you can create a staging site in a matter of minutes! Let’s walk through what the process will look like for DreamPress users.
We built DreamPress specifically for WordPress, so you can expect top-notch server performance, security, and technical support for your WordPress site. Beyond our staging services, you’ll get a lot of great features such as built-in caching, on-demand backups and restore, isolated cloud resources just for your site (no sharing with other websites), email accounts, and even a free domain with annual plans.
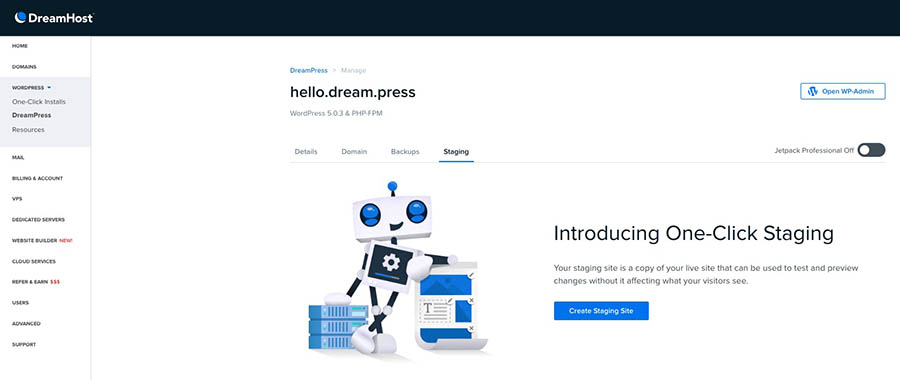
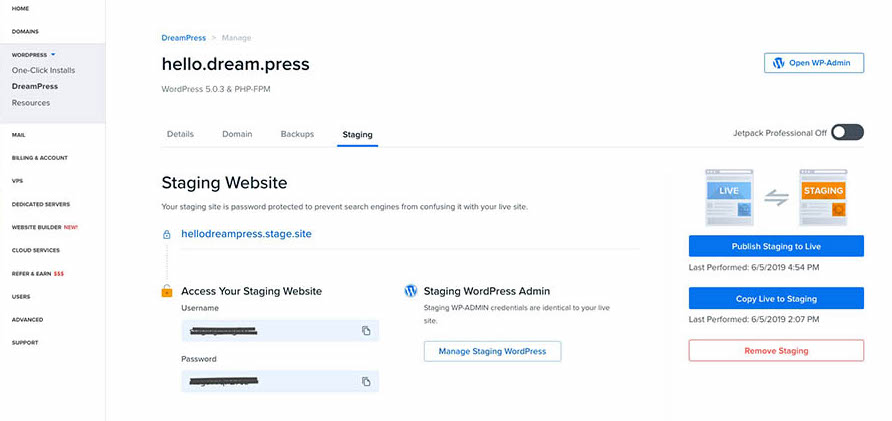
First, visit your control panel and navigate to DreamPress > Manage (if you have more than one site on DreamPress) > Staging.
If you haven’t set up staging site yet, you’ll come across the screen below. Click on the Create Staging Site button.
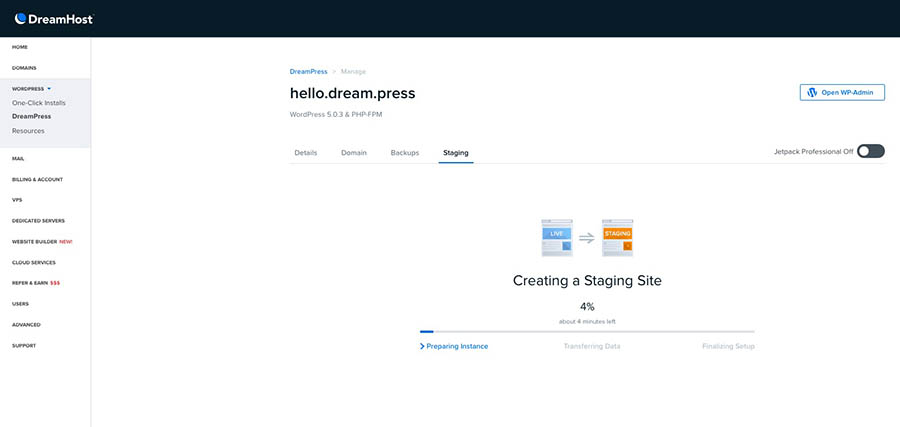
From there, your staging site will be set up in just a few minutes on a free subdomain automatically generated for you! That’s right, you don’t have to create a subdomain; we’ll do it for you. Your staging subdomain enables you to keep your staging site on a separate install from your live site, so both can run independently. For example, your staging subdomain might be called mysitecom.stage.site.
When it’s ready, you’ll also receive an email at the address connected to your DreamHost account. Your staging site will be password protected; you can locate your username and password in the staging tab of your DreamPress dashboard. Your login credentials for your staging site’s WordPress dashboard will be the same as your live site’s.
Once you’re all set up, you can copy your live site to staging or publish from staging to live with just a click — it’s that easy! The cherry on top, before you push any changes from staging to live — we automatically perform a backup of your live site, just in case! DreamPress makes staging simple in both setup and functionality, so you can safely test and experiment all you need without risk or hassle.
WordPress Staging Made Simple
Safely test changes to your website before you roll them out to visitors. Now you never have to worry about breaking your site — included with EVERY DreamPress plan.

2. Use a Plugin to Set Up Your Staging Site Quickly
If you can’t create a staging site through your web host (or you don’t want to for whatever reason), there’s another option. You can use a dedicated plugin to get the job done. Depending on the plugin you choose, the process of creating your staging site will be simplified to some extent, although you may not get as many options for working with it as you would through your hosting provider.
There are a lot of plugins that are either designed for this task specifically or include it as one of their features. We’d recommend taking a look at WP Staging, which is one of the most straightforward and targeted solutions you can find.
This plugin makes it easy to create a clone of your live site, which will be saved in a subfolder of the main installation. What’s more, you won’t need any technical know-how to make it work. For a similar solution with more options, you can check out the premium plugin, WP Stagecoach. Among other things, it makes pushing changes from your staging site to your live site a breeze.
For now, let’s look at how to create a staging site with WP Staging. You’ll first need to install and activate the plugin within WordPress on the site you want to copy. Then, a new WP Staging tab will appear on your dashboard.
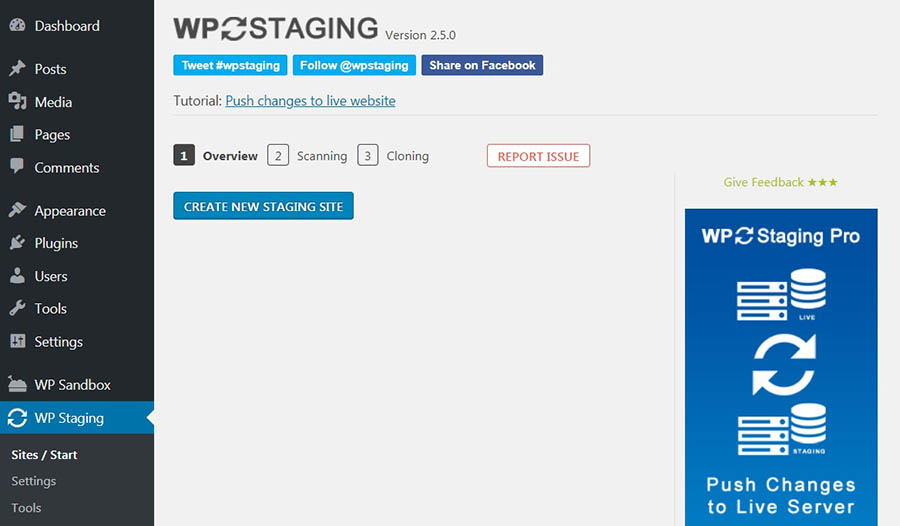
Click on Create New Staging Site, and you’ll be able to give it a name. You’ll also see some other options available on the drop-down menu.
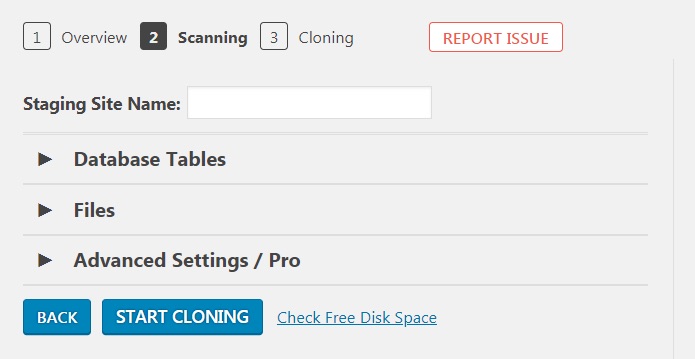
Database Tables will enable you to exclude copying certain data. However, in most cases, you’ll want to copy everything — so you can ignore this section. The same is true for Files, which offers advanced customization options you aren’t likely to need at this point.
Instead, select the Start Cloning button. The plugin will take a little while to do its thing. Meanwhile, you’ll see a progress bar that lets you know it’s still working.
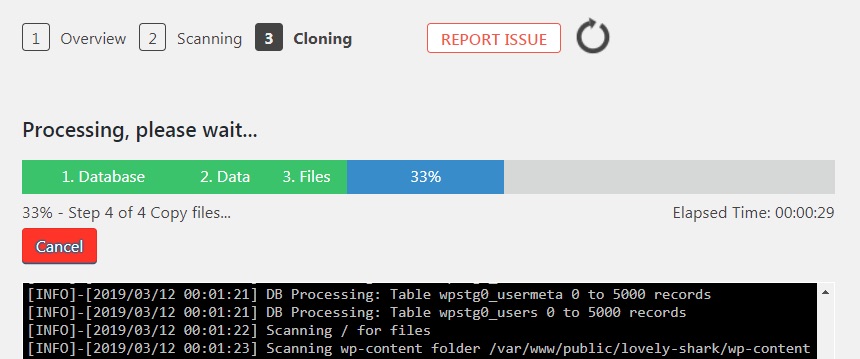
When the process is complete, you’ll see a success message, and be provided with a link to your new staging site. You can either click on the link or the Open staging site button to visit it, using your regular credentials to log in.
We recommend taking a little time at this point to explore your staging site, making sure everything has copied over correctly. It should be a perfect duplicate of your live site. As long as everything looks in order, you can now start using it to perform experiments, test out new plugins or themes, and conduct troubleshooting.
But what if you make changes to your staging site and want to put them in place on your live site? You could make the alterations manually to both sites. However, it can be far easier to tweak your staging site until it’s just right, then copy those changes over to the real version. You can do this with WP Staging as well, although you’ll need to purchase the plugin’s premium version.
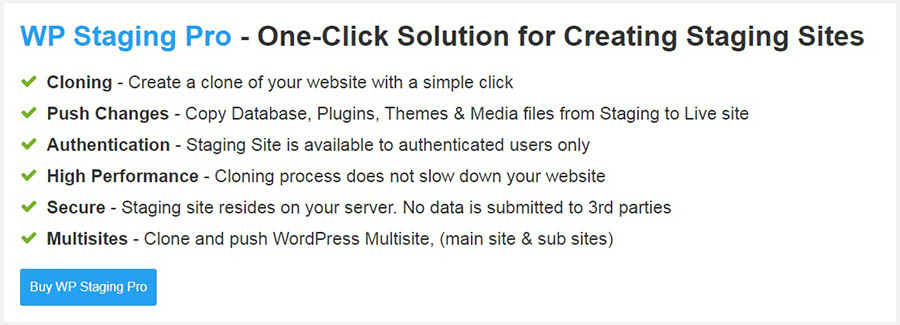
This isn’t exactly a cheap solution since it will cost you about $100 for one site, but it can be worth the investment if you plan to make frequent use of your staging site. If you do opt for WP Staging Pro, you can follow the developers’ handy tutorial for pushing changes to your live site.
Finally, it’s worth mentioning that if you only want to create a new WordPress site for testing and experimentation and don’t need it to be a copy of a different site or intend to make it live, there’s another option. You can create a local WordPress website, stored on your local machine. This way, you can work with your staging site offline, and no one will be able to access it unless they’re using your computer.
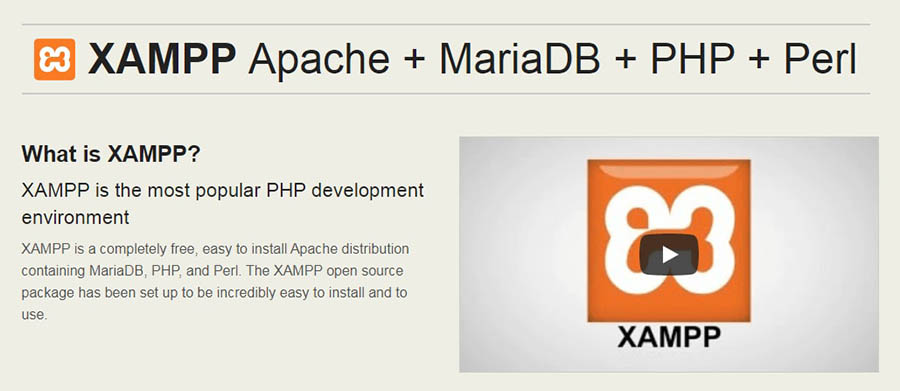
You can use a tool such as XAMPP (for Windows users) or MAMP (for Mac users) to create one or more local sites quickly.
If you want, you can also use these solutions to copy and push changes to your live site, but the process is more involved than the methods we’ve outlined above. Until you have a little more technical experience under your belt, we’d recommend sticking with one of those instead.
Related: How to Use Git with WordPress
What to Do Once Your Staging Environment Is Ready
Regardless of which method you use, in the end, you’ll have a shiny new staging environment ready to go. Before you start working with it in earnest, however, there are a few initial steps you’ll want to take.
Any time you create a staging environment, we’d recommend following these steps:
- First, if you’ve copied over your live website, go through your staging site and make sure everything has been transferred correctly. Make sure content is formatted the right way, images and other media are appearing, key features are working, and so on.
- In your WordPress dashboard, navigate to Settings > Reading, and check the box labeled ‘Discourage search engines from indexing this site.’ This will help ensure that no one can stumble across your site if it’s hosted online. Note: DreamPress customers don’t need to worry about this as all DreamPress staging sites are non-indexable by default.
- While still in your dashboard, go to Settings > Permalinks. Make sure that the staging site’s permalink structure is set up correctly (in other words, that it’s the same as your live site). Otherwise, you can end up seeing 404 errors.
After that, you should be set up and ready to go. Before we wrap up, however, it’s worth noting that there are other options for more advanced users. GitHub and BitBucket, for example, are services developers use to share and collaborate on projects (for example, when creating websites, themes, and plugins).
They can also be used to keep track of the changes to your staging site and even share them with others to get help and feedback. If you’re interested in learning more about these tools and how they can help you build websites, there are plenty of guides you can check out that will get you started.
Get Content Delivered Straight to Your Inbox
Subscribe to our blog and receive great content just like this delivered straight to your inbox.
The Staging Business
Creating a staging website is a smart way to simplify the ongoing maintenance of your live site. Whether you have a copy of your live site hosted online with a managed WordPress hosting solution like DreamPress or on your local computer, staging enables you to test changes in a safe environment. Plus, there’s no chance you’ll bring down your live website in the process or break any features; it’s a win-win situation for both you and your site’s visitors.
If you’re feeling overwhelmed, remember that DreamPress is designed to make running a powerful WordPress website simple. While staging can require a complicated development process, DreamPress makes it easy — no coding experience needed. Check out our managed WordPress hosting plans and find the right fit for your site.