Decoding WordPress: The Media Library
The WordPress Block Editor enables you to upload images and files directly to your site’s posts and pages. However, your media collection can become disorganized over time, and you might struggle to find media that you uploaded in the past.
Fortunately, you can use the WordPress Media Library to organize your images and files. Thanks to multiple views and filters, you can develop an effective organizational system for your uploaded files. Additionally, you can optimize your images to rank higher in search results.
In this post, we’ll give you an overview of the WordPress Media Library and its main features. Then, we’ll show you how to extend these features and fix any potential errors that occur. Let’s get started!
An Introduction to the WordPress Media Library
When you upload images, videos, and audio files to your WordPress website, these are stored in your Media Library. Essentially, this catalogs every piece of media you’ve used in your posts and pages.
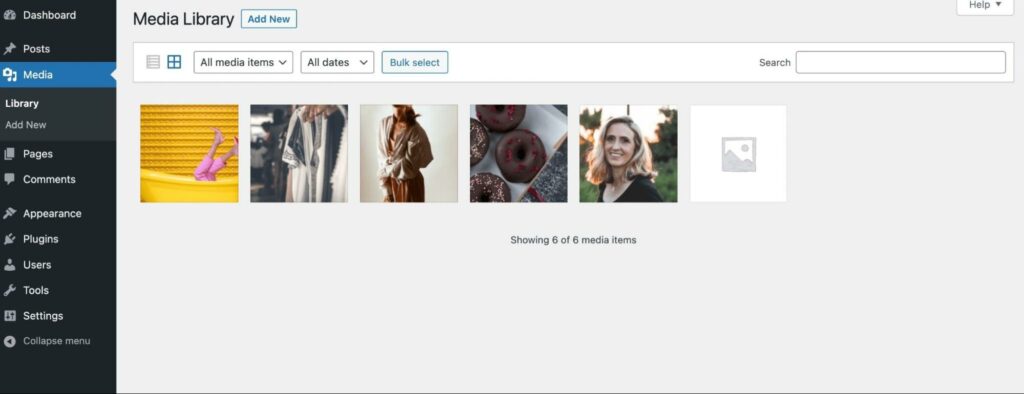
To open the Media Library, click on the Media tab in your admin dashboard. Then, you’ll be able to view your files and upload new ones if needed:
Here are some files you may see in the Media Library:
- Images (.jpeg, .jpeg, .png, .gif, .ico)
- Audio files (.mp3, .m4a, .ogg, .wav)
- Videos (.mp4, .mov, .wmv, .avi, .mpg, .ogv, .3gp, .3g2)
- Documents (.pdf. .doc, .docx, .odt, .psd)
- Spreadsheets (.xls, .xlsx)
- Powerpoint presentations (.pps, .ppsx, .ppt, .pptx)
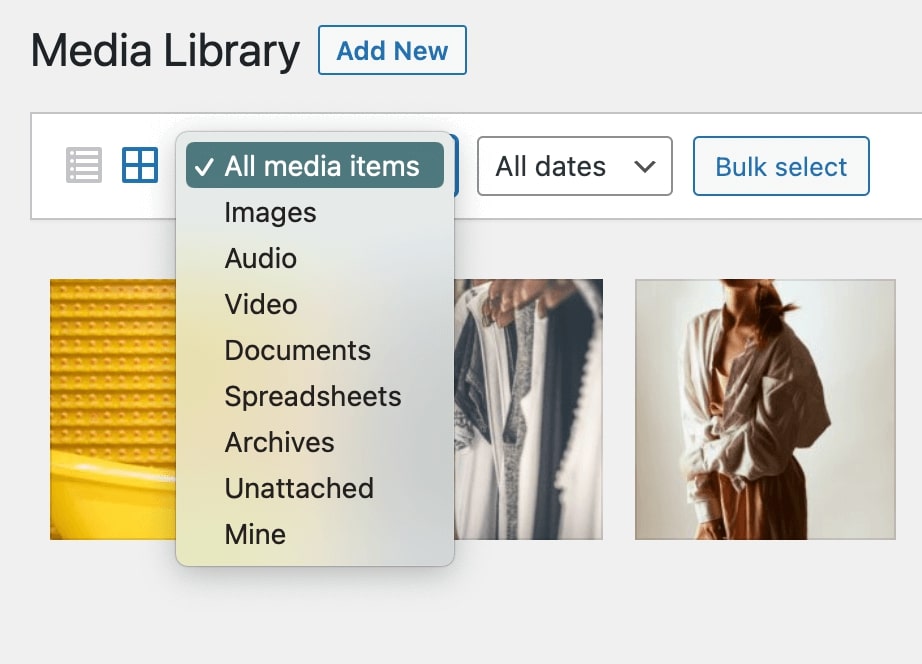
If you need to narrow down your results by type, you can use the dropdown menu. Here, you’ll see the file types listed above, along with items labeled Unattached, Archives, and Mine:
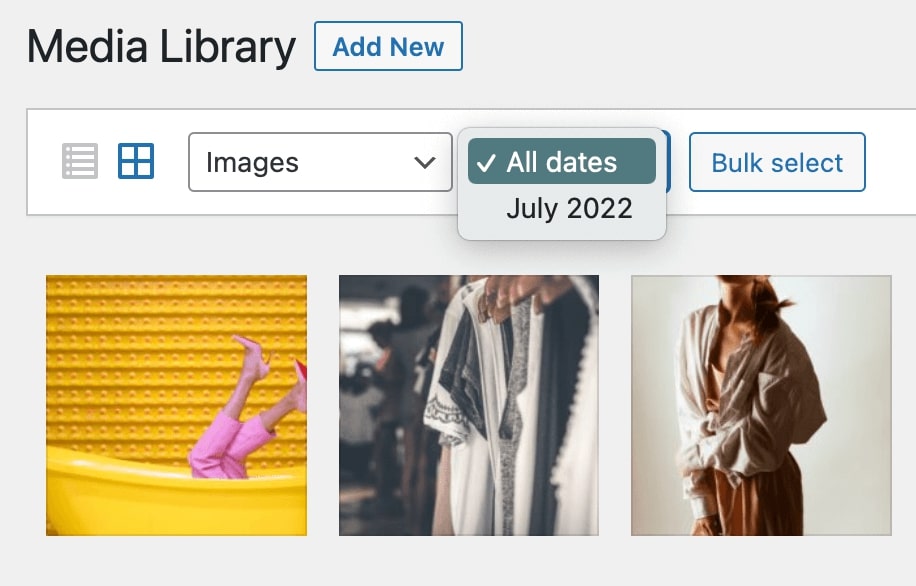
You can also select a specific upload date. This can be particularly helpful if you’re unable to find an image but you know when it was uploaded:
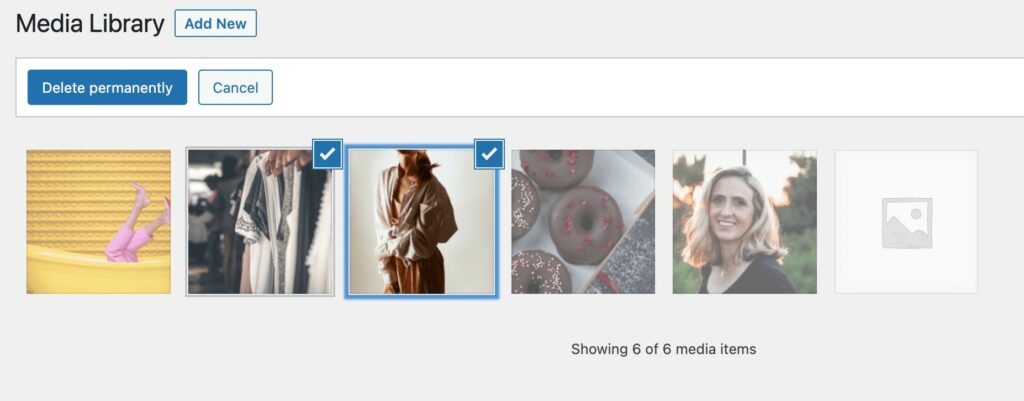
To organize your Media Library, you can use the Bulk select button. Then, you can select multiple images and delete them permanently:
In the top-right corner, you’ll see a search bar. Here, you can enter keywords to filter your results:
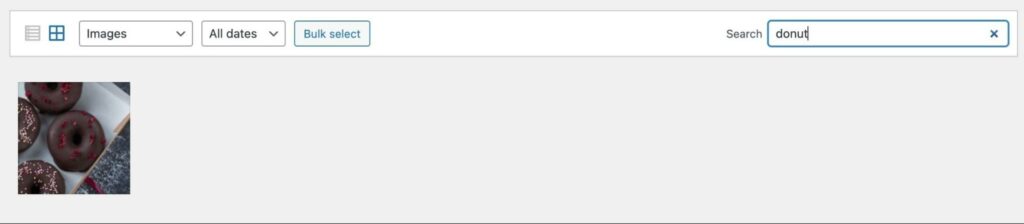
Please note that you’ll have to have tagged the images with these keywords beforehand — but adding this little bit of extra effort to your workflow can make a huge difference when you’re trying to find things in the future.
As you can see, the Media Library can help you organize the files on your website. It provides an all-in-one solution for uploading, editing, and deleting files.
5 Useful Media Library Features
If you’re new to WordPress, you might not know how to use the Media Library. Fortunately, this tool is very user-friendly, and it enables you to upload, view, and edit media files on your website. Let’s take a look at its main features.
1. Multiple Views
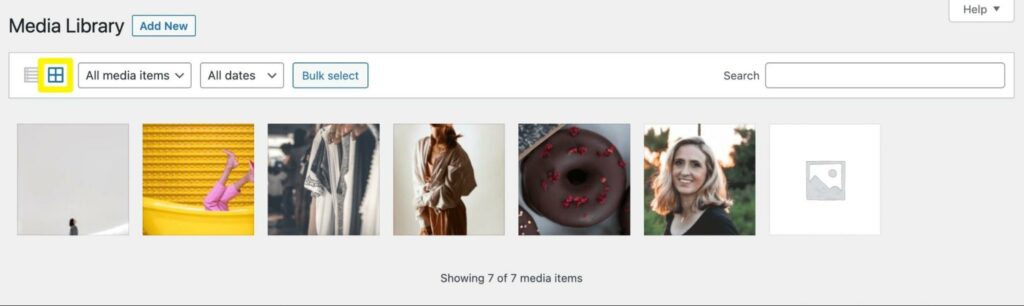
The Media Library lets you change the way files are displayed. You can either view them in a grid or a list.
By default, the Media Library shows items in a grid view, with a thumbnail for each file:
As we mentioned earlier, you can filter the results by media type and date. If you want to view the details of a certain file, you just have to click on it:
Alternatively, you can switch to the list view. Instead of a gallery-like grid, your files will be displayed in a list:
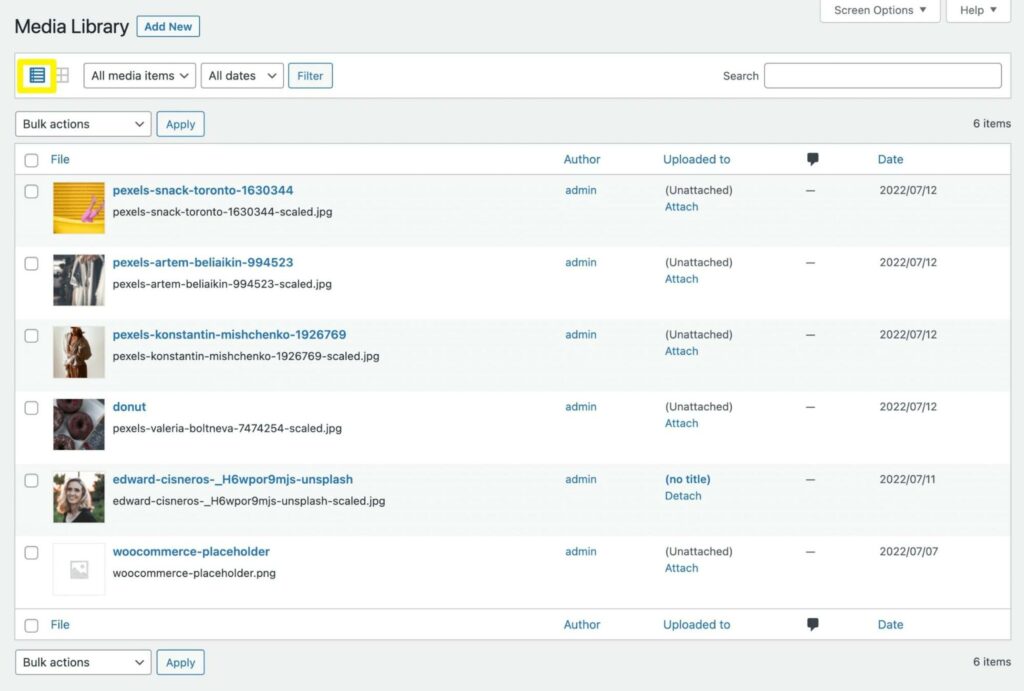
On the left-hand side, you can use the checkboxes to bulk-select files. Next to this, you’ll see a thumbnail representing each media item.
Here’s what else you can see in a list view:
- File: The file title, as well as the full name of the file.
- Author: The user that uploaded the file.
- Uploaded to: The title of the post or page where the file was uploaded.
- Comment bubble: The number of comments for that file.
- Date: The date when the media was uploaded.
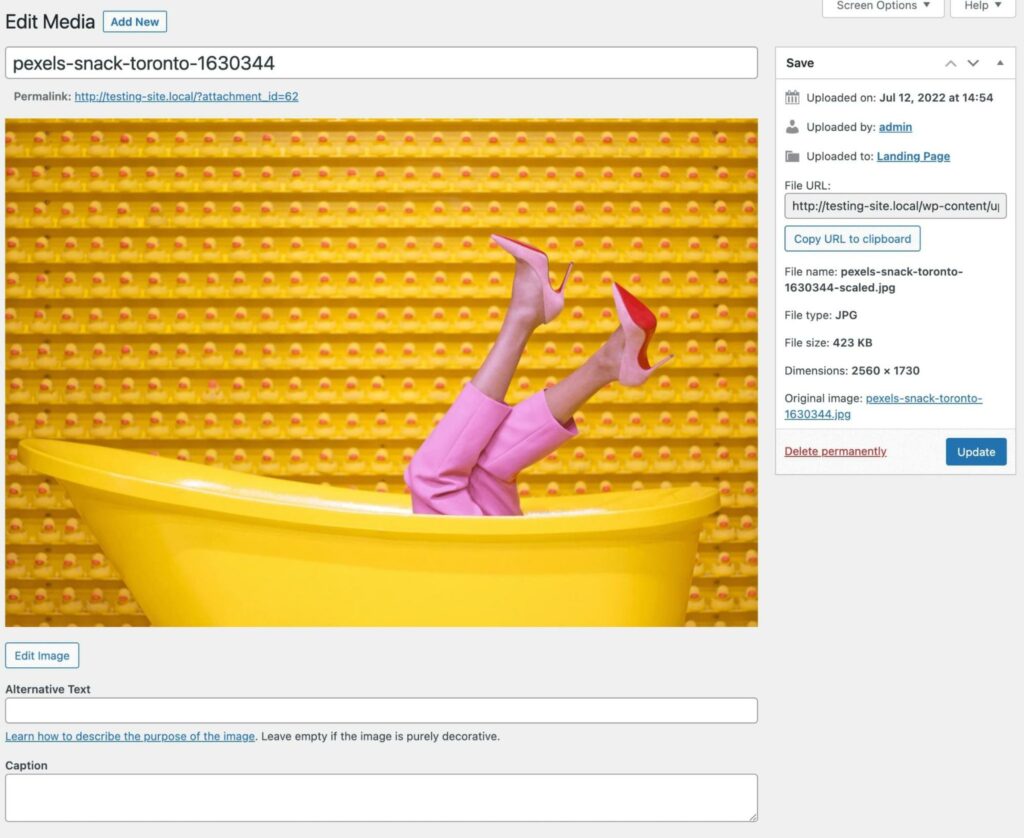
If you click on the file name, this will open the image editor:
You can switch between these two views at any time, depending on your preference. However, the list view can be a better option if you want to view a file’s details without having to click on it.
2. Multiple Ways to Upload Files
When you need to upload a file to your website, you can add it directly to a post or page. The Block Editor lets you add images, videos, and other files with blocks:
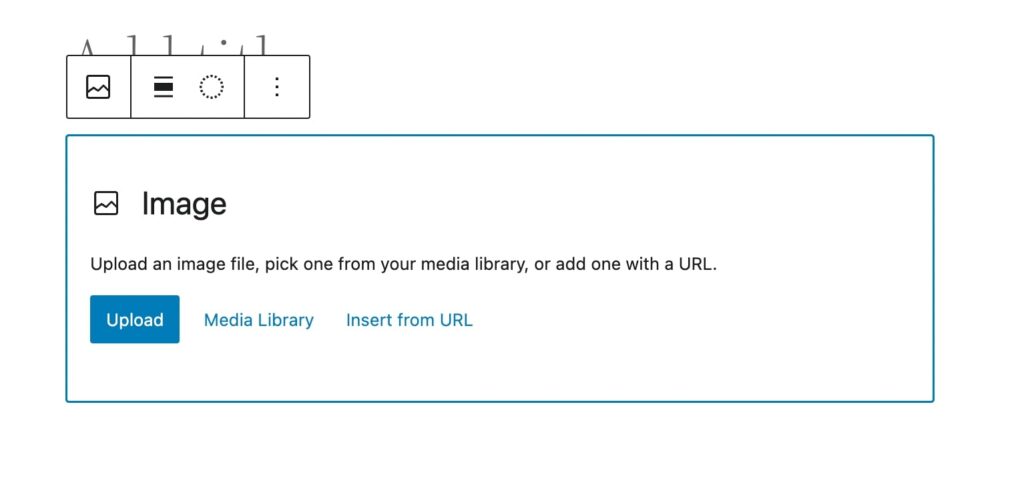
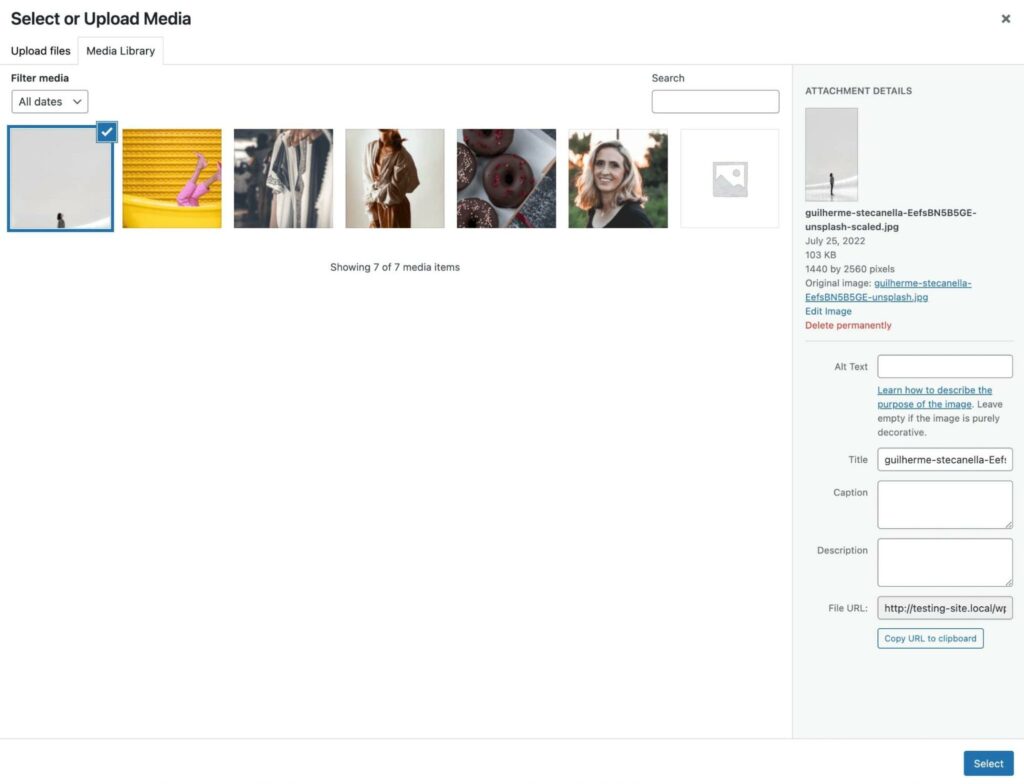
Once you select the relevant block, you can click on Upload and choose a file from your computer. If you’ve uploaded the file to WordPress before, you can select it from your Media Library:

You can also drag and drop a file directly into this section. This will automatically upload it into the Media Library, and you can then add it to the post:
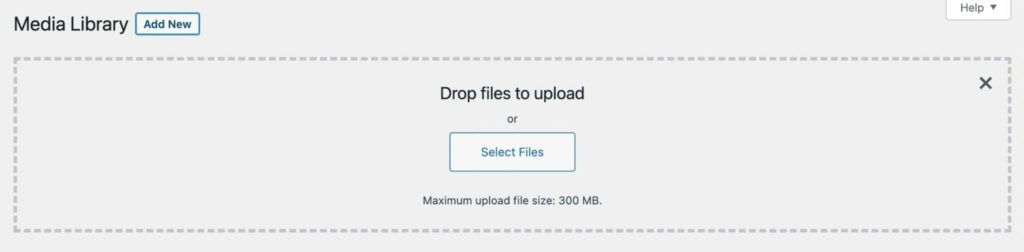
You can also upload images directly to the Media Library. Simply click on Add New, then drag and drop files into the upload area or select them from your computer:
With any of these methods, your media files will be automatically imported into WordPress. Even if you uploaded your files in the Block Editor, you’ll still be able to find them in the Media Library.
3. Downloadable Files
The Media Library also lets you download your files to your computer. This can be useful if you need to use the same images or videos on another site.
To download a file from your WordPress dashboard, click on the Tools tab and select Export:
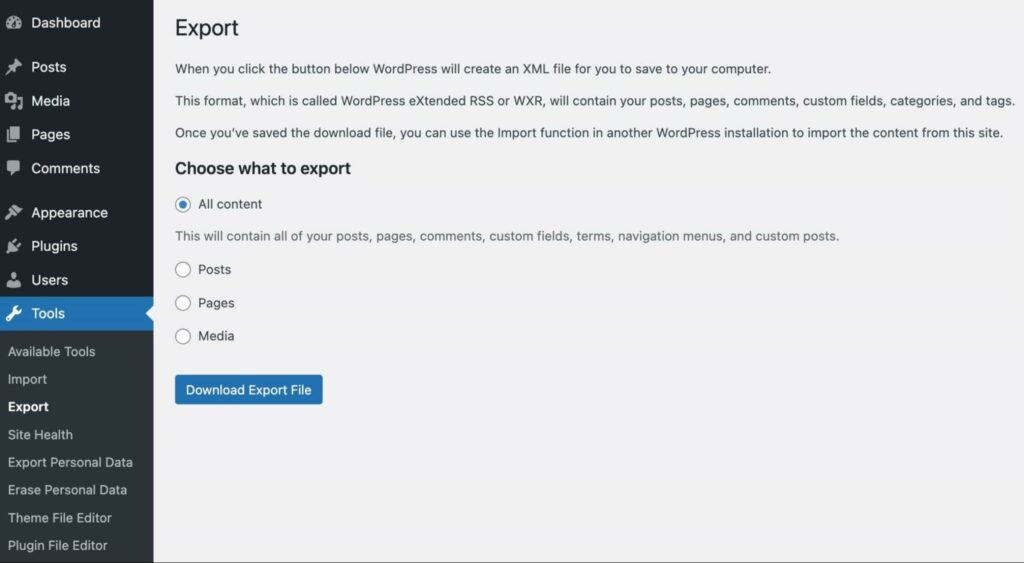
On this page, you can download all of your site’s content. This includes posts, pages, and media files.
Select Media, then use the dropdown menus to download files that were uploaded within a certain timeframe. You’ll simply have to specify a Start date and End date:
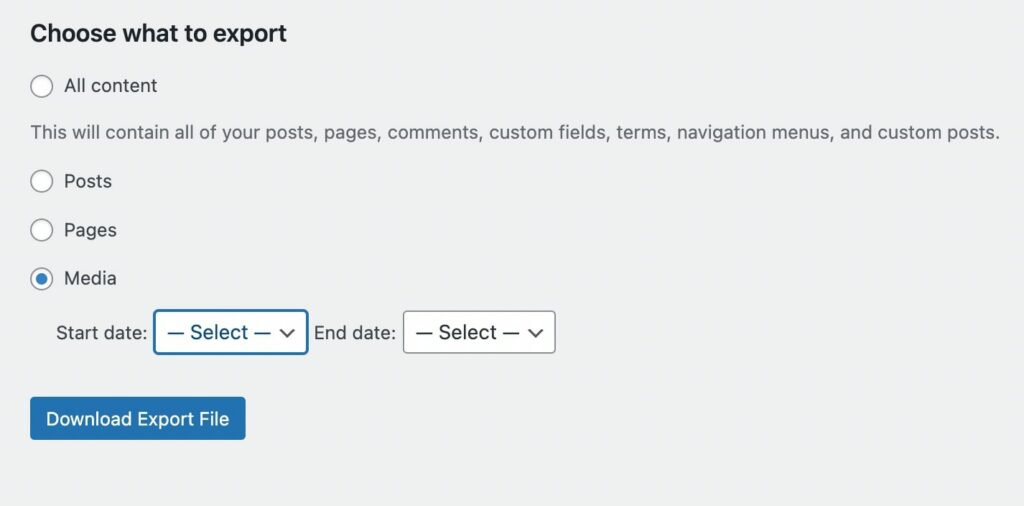
If you want to download all of your media files, you can leave these fields blank. When you’re finished, click on Download Export File. This will download links to the relevant files to your computer in an XML file format that can then be imported into another WordPress install.
4. Image Editing
As a website owner, it’s vital that you optimize your images before publishing them. Large files can slow down your site and take up a lot of storage space.
The Media Library has many native image editing features. For example, you can crop your images, scale them, and more.
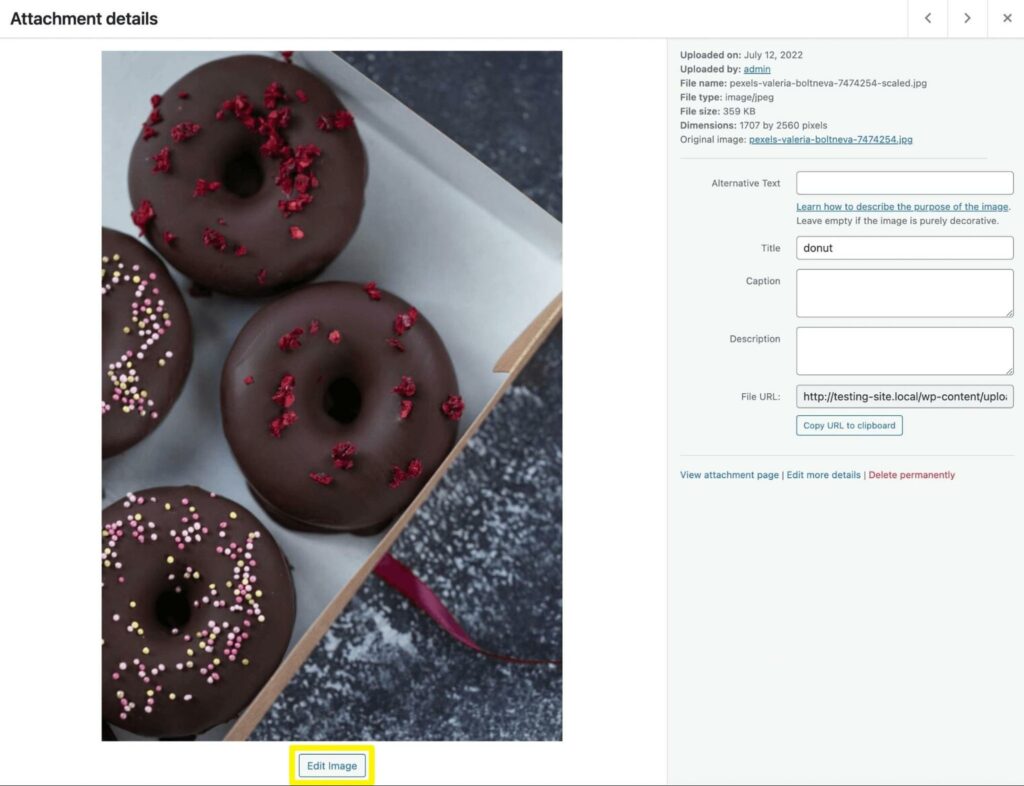
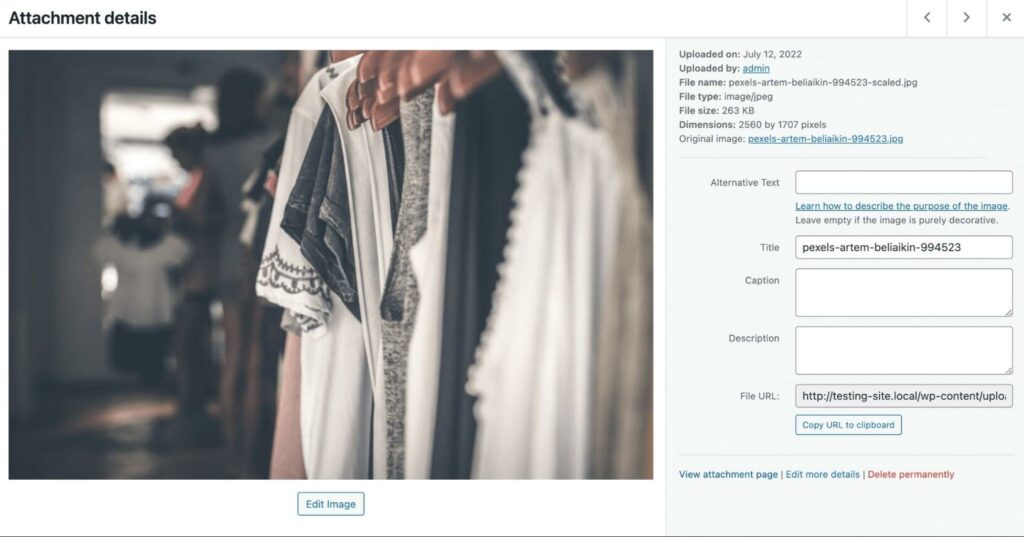
Start by clicking on an image to open the Attachment details page. Then, under the photo, select the Edit image button:
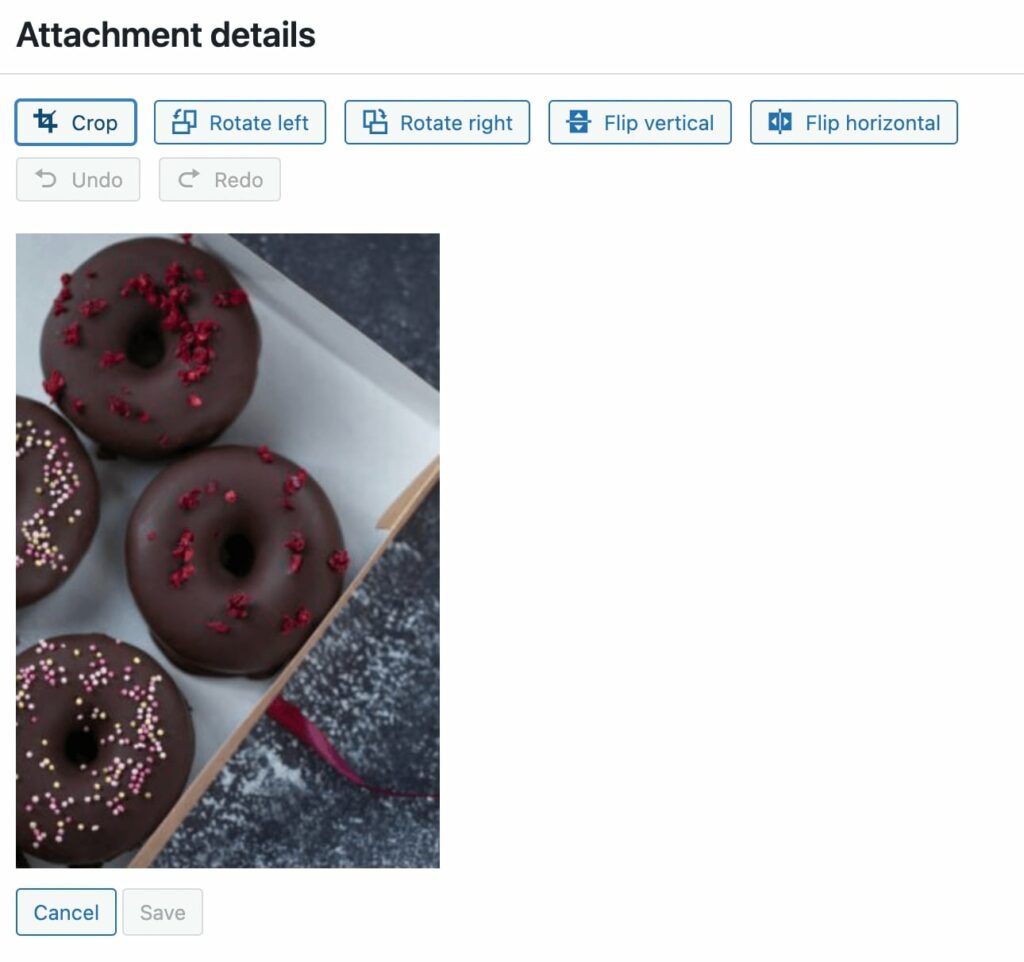
This will automatically open the image editor. On the left, you’ll see options to crop, rotate, or flip the image:
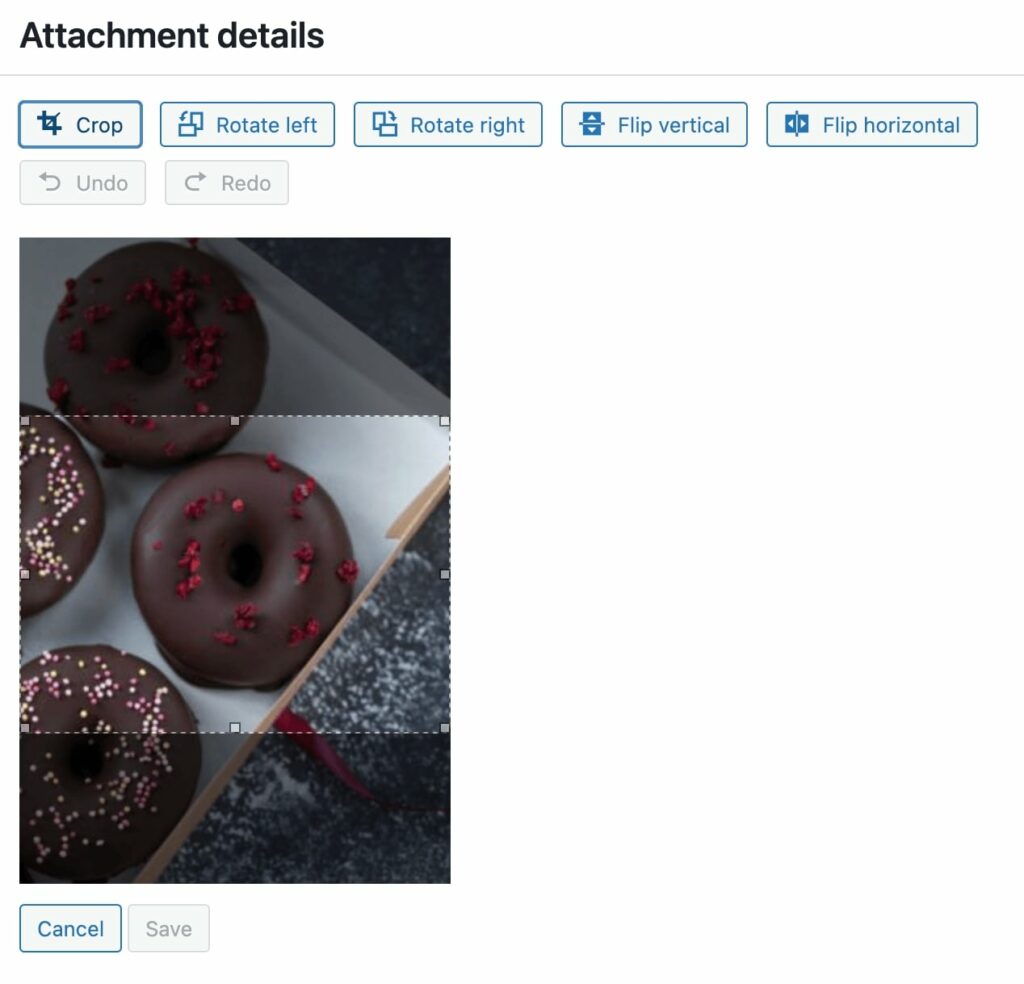
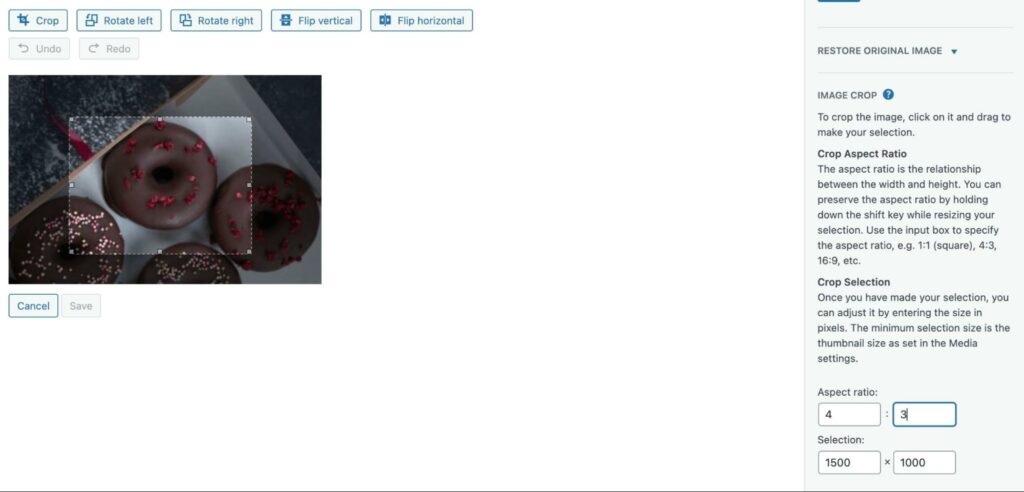
If you select the Crop button, you can use the handles on the box to remove certain parts of the image. When you’re finished, click on Crop again:
Using the rotate options, you can flip the image 90 degrees to the left or right:

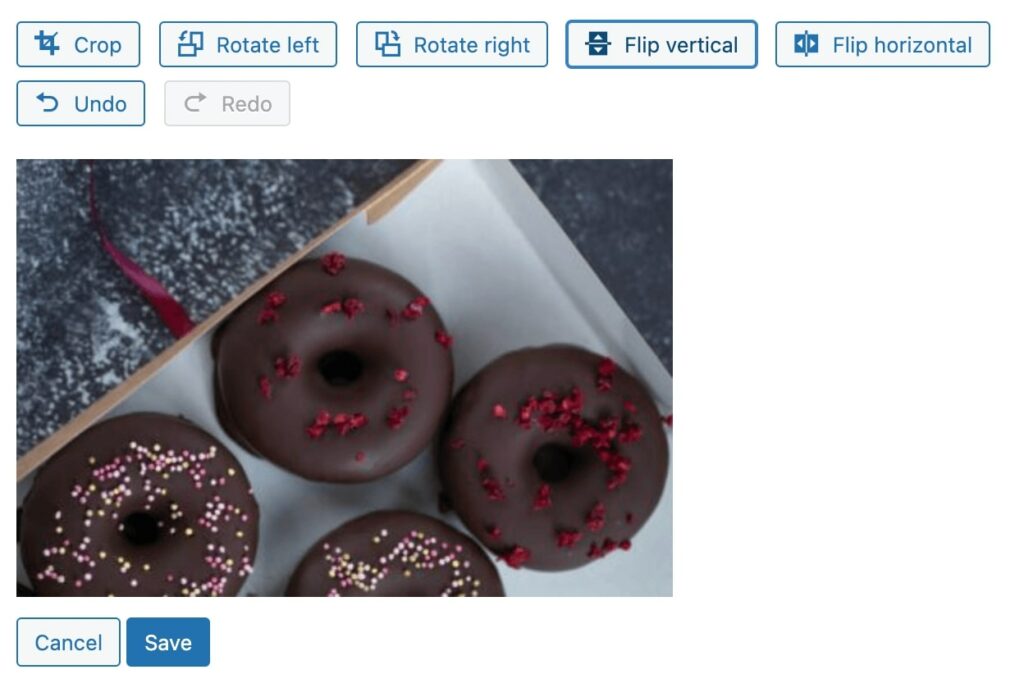
If you need to invert the image, you can use the Flip buttons. These will reflect the photo vertically or horizontally:
On the right side of the page, you’ll see the original dimensions of the image. To scale the image, you’ll just need to enter the new dimensions:
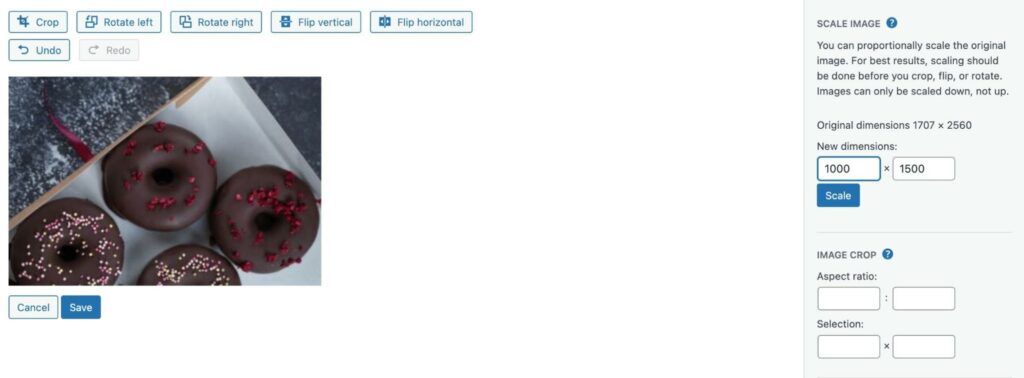
Additionally, you can click on the Crop button and enter the size in the Selection fields. You can also choose an Aspect ratio, which is the relationship between the height and width of the image:
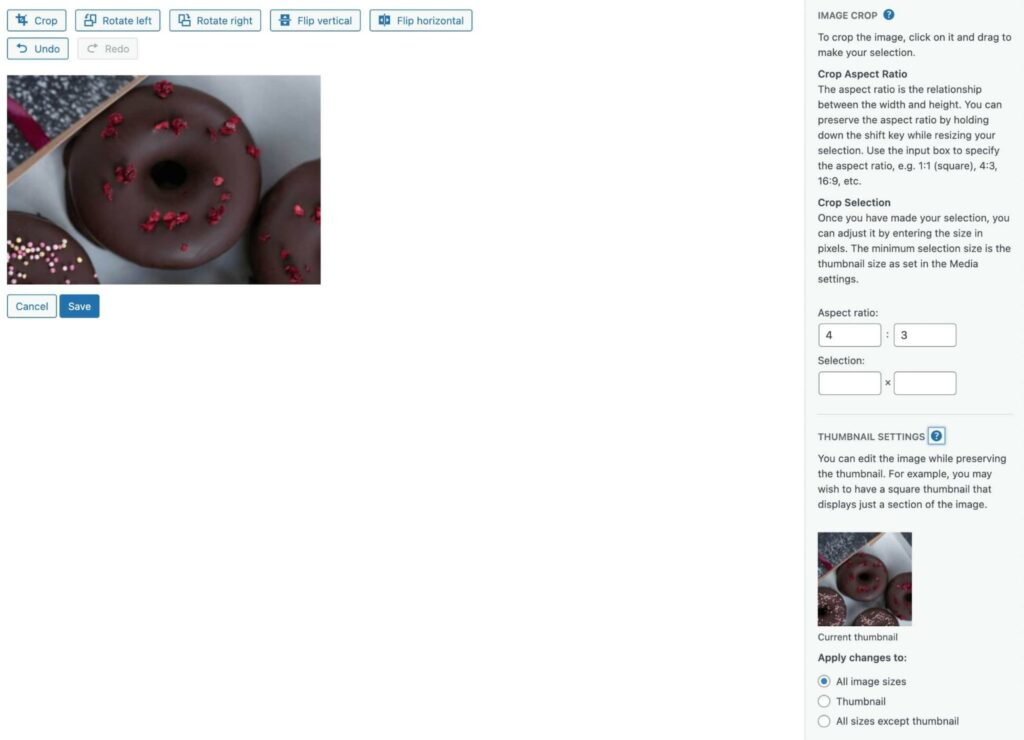
The last feature you’ll see in the image editor is the Thumbnail Settings. Here, you can apply your changes to all image sizes, the thumbnail only, or all sizes except the thumbnail:
When you’re finished, save your changes. You can now view the edited photo in the Media Library.
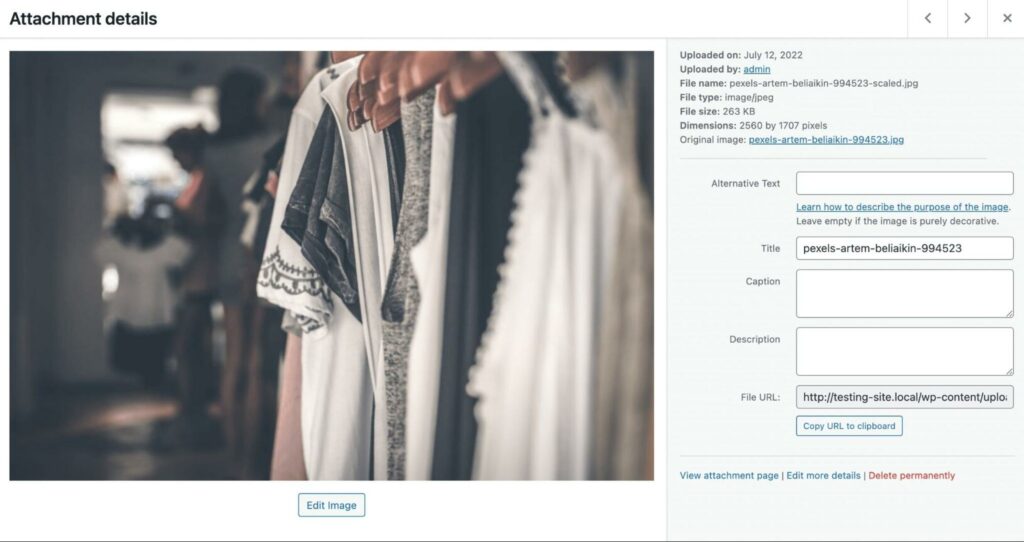
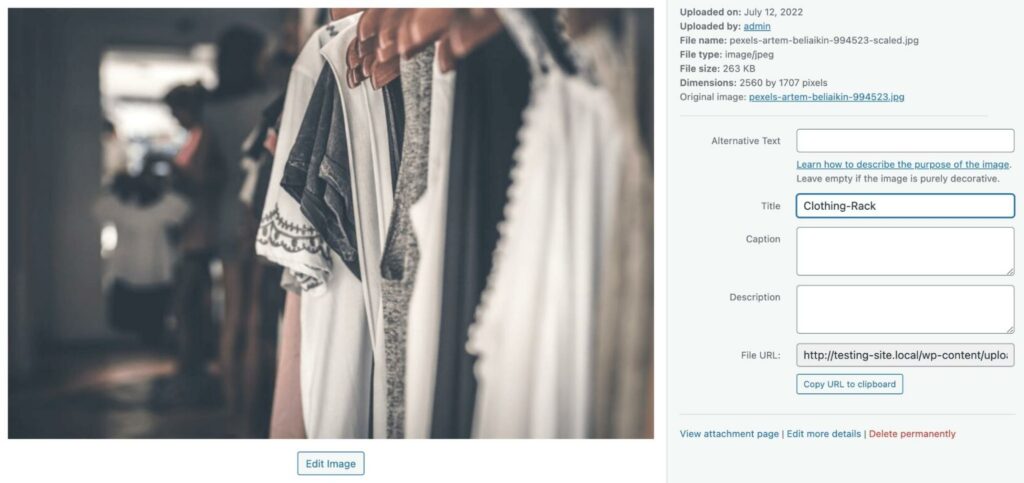
5. Image Metadata
In the Attachment details page of your image, you’ll see an option to add metadata. This contains basic information about the image, including the file name, author, and description:
After you upload an image, WordPress will use the file name as its title. However, you can edit this to provide a more accurate description:
You can also add alternative text. This describes the contents of the image when it can’t be displayed. Additionally, it can make your website more accessible to users with screen readers:
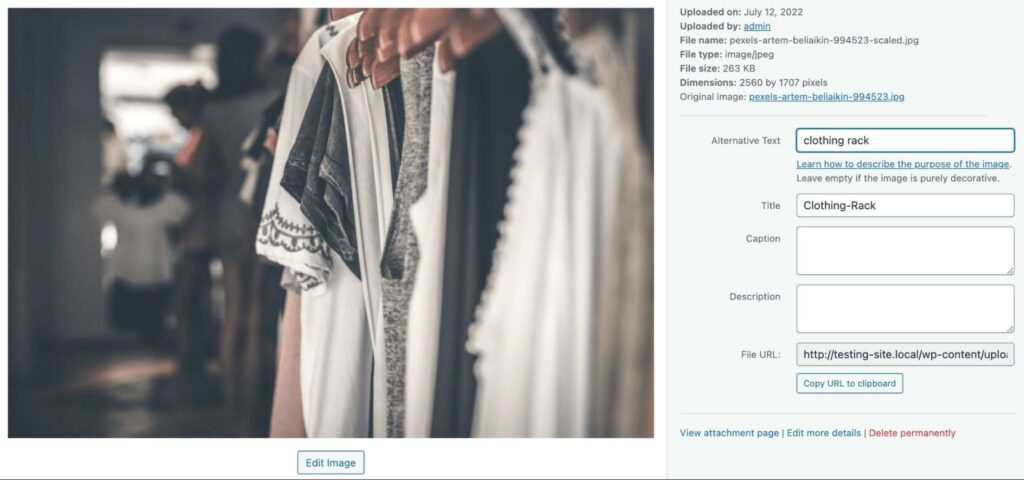
Along with improving user experience, alternative text can boost your search ranking. It enables search engines to understand your images and their purpose on the page.
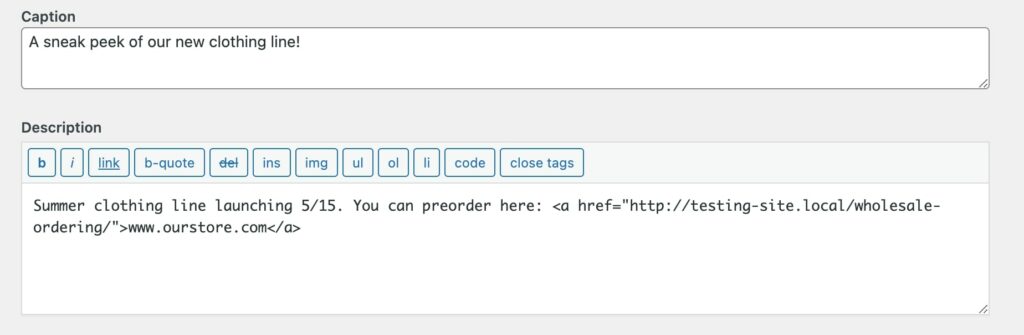
You might also want to write a caption and description to provide more information about the image. While the alt text is only visible to search engines and screen readers, the caption is visible to all front-end users:

Meanwhile, descriptions will appear on the image attachment page. Here, you can post copyright details, keywords, links, and more:
This information will be saved in the Media Library. When someone visits the image URL, they’ll be able to see its description.
How to Extend the Features in the Media Library
The Media Library provides the essential tools you need to upload and edit media files. However, you may need to install a plugin to extend its core functionality.
As you upload more images to your website, your Media Library can get a little disorganized. Although you can delete images in bulk and use filters to find what you need, you may become overwhelmed by the volumes of files on your website.
With the Real Media Library plugin, you can create folders in your Media Library:
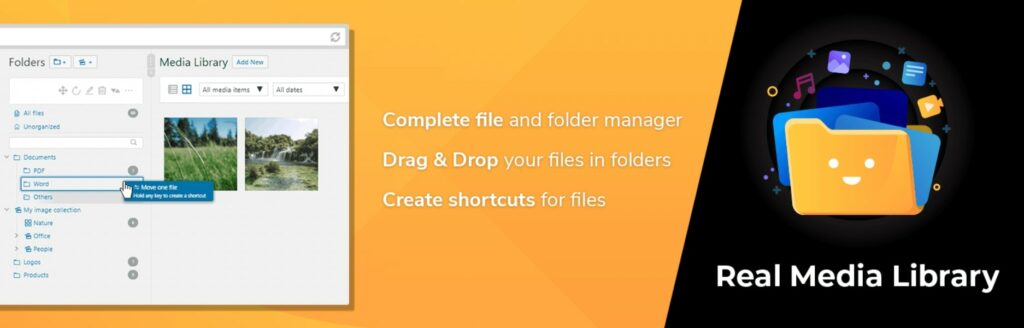
This tool has a drag-and-drop interface that enables you to easily move media items to different sections. Plus, the pro version supports subfolders, image galleries, and rearranging within a folder.
Alternatively, you can use the free version of Media Library Organizer to add media categories for better media management:
The native editing features in the Media Library may not fully optimize your images. Often, you’ll need to compress image files in order to speed up your website.
With the TinyPNG plugin, you can let your WordPress install automatically compress your images as you upload them:

Additionally, you may want to replace old files with newer versions. With the Media Library, you’ll have to upload the new file, locate the old version, and delete it.
Enable Media Replace is a popular WordPress plugin that you can use to quickly replace files in your Media Library:
Even though you might not need these tools, they are available to help you optimize your website and manage your files more efficiently. They can be particularly useful when activated on media-heavy sites.
How to Fix Common Media Library Errors
Although the Media Library is very user-friendly, you might run into some common image upload issues. Fortunately, most of these problems are easy to fix.
HTTP Error
One of the most common issues in the Media Library is an undefined HTTP error. This crops up when something goes wrong during the upload process.
When this happens, it’s a good idea to wait a few minutes before trying to upload the file again. Sometimes, it’s just a temporary resource allocation problem.
Alternatively, this common image error could be caused by your browser. You can try switching to another browser to see if it solves the problem.
If the error persists, you can try clearing your browser cache and deactivating your plugins. Alternatively, you might need to increase your site’s memory limit.
Get Content Delivered Straight to Your Inbox
Subscribe to our blog and receive great content just like this delivered straight to your inbox.
Upload: Failed to Write File to Disk
When you’re uploading files to your website, you may also come across the Upload: Failed to Write File to Disk error. Usually, this results from incorrect file permissions. However, you could have maxed out your hosting plan’s disk space limit or temporary folder.
To fix this error, you’ll need to check the file permissions for your website. First, you’ll need to connect to a Secure File Transfer Protocol (SFTP) client to access your site files. Alternatively, you can use the File Manager in your hosting account.
If you have a DreamHost account, open your dashboard and go to Websites > Files and FTP Users:
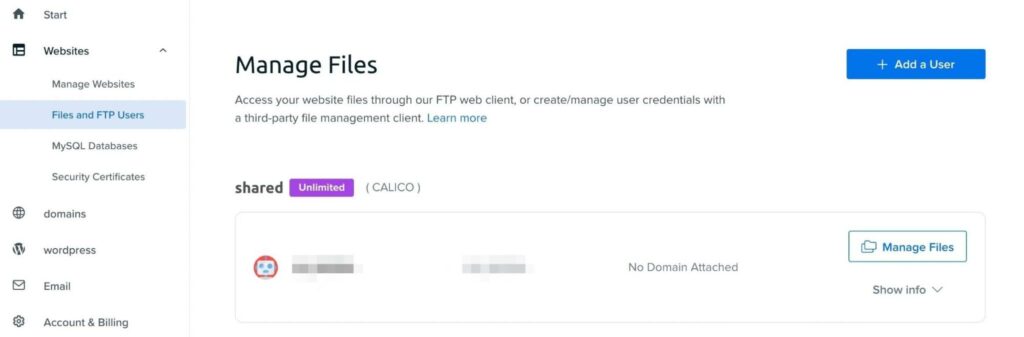
Then, click on Manage Files next to your website. In your File Manager, find the wp-content file and right-click on it:
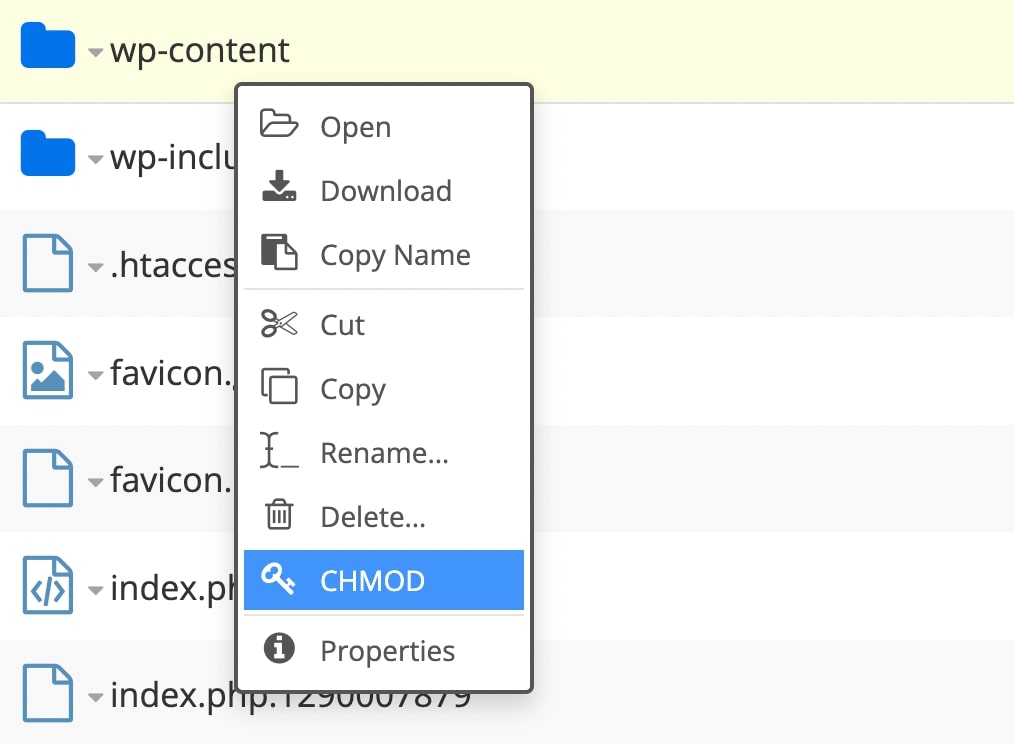
For DreamHost accounts, you can select CHMOD. If you’re using another program, click on the File Permissions option. This will open a pop-up window:
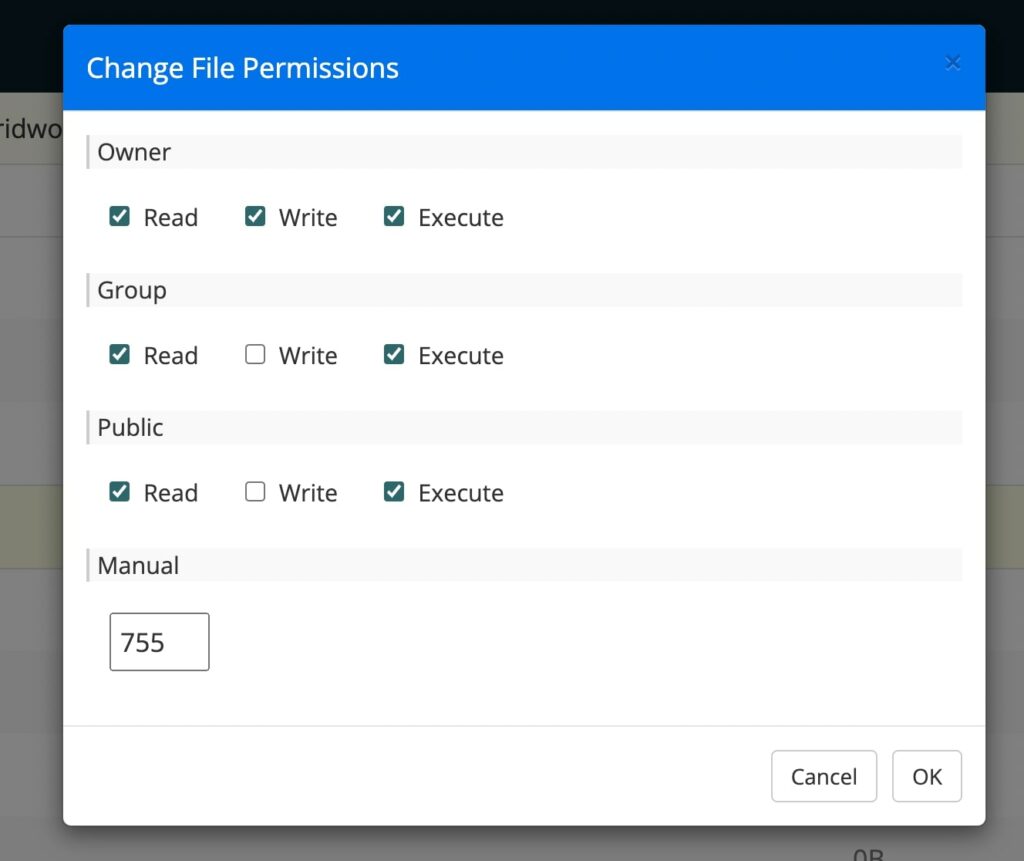
Make sure the Numeric value is set to ‘755’. Then, click on OK to save your changes. This should help resolve the issue.
Media Library Failing to Load
Occasionally, your Media Library might fail to load altogether. This can happen if you’re using a poorly-coded theme or plugin.
You might also see this error when there’s a conflict between two plugins. Third-party software can cause compatibility issues with other programs.
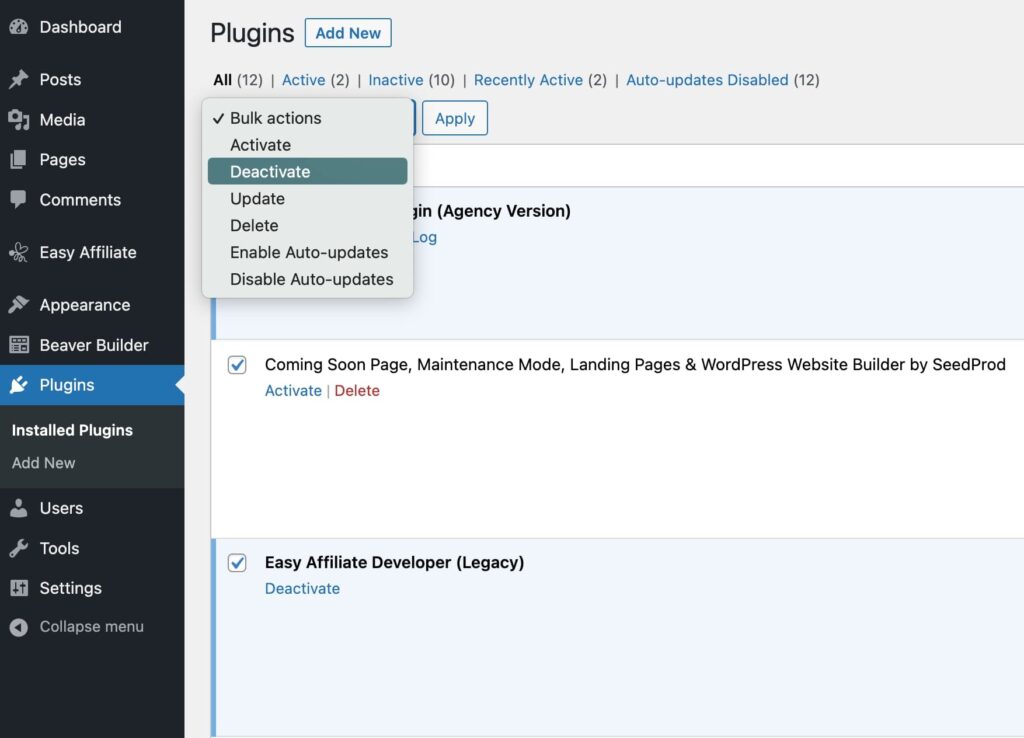
To resolve the issue, start by deactivating your plugins. Select them all, then choose Deactivate from the Bulk actions menu and hit Apply:
Now, refresh the Media Library page to see if this solved the problem. If so, you’ll need to reactivate each plugin one at a time and keep refreshing the Media Library until the issue reappears. This should help you identify the culprit.
If deactivating the plugins doesn’t help, then the problem might be your theme. Consider activating a default WordPress theme, then try accessing your Media Library again.
Organize Your WordPress Images
The WordPress Media Library enables you to upload, modify, and delete files on your website. You can also use it to crop and scale images without leaving your dashboard.
To review, here are the main things you can do in the Media Library:
- View uploads in a grid or list view.
- Upload files in the Media Library or Block Editor.
- Download files to your computer.
- Edit image size, pixels, and orientation.
- Add image metadata.
Although optimizing images can improve your loading times, you’ll want to build a fast website from the ground up. Our managed WordPress hosting plans come with several performance tools to help you grow your site. Check out our plans today!
Do More with DreamPress
DreamPress Plus and Pro users get access to Jetpack Professional (and 200+ premium themes) at no added cost!